How to get free DynDNS with DigitalOcean API and Kubernetes ScheduledJobs
Using Kubernetes ScheduledJobs and DigitalOcean API to get free DynDNS analog.
DynDNS is annoying/expensive
I’m using different DynDNS services at home for the last few years. It’s easy to use, comes preinstalled on most of the routers. The only annoyance is the need to confirm each of your hosts every 30 days And it’s fine because you do not pay anything.
Recently, I wanted to attach proper domain to my home server to be able to access my Kubernetes from the outside. I tried to get static IP from my provider, but they told me that static IP is not compatible with my connection. That was really disappointing. I even thought of buying premium from one of the dynamic DNS providers. But when I saw their prices per year, I dropped this idea. Charging $30-$40 per year for just adding a periodic call to update IP address is too much.
DigitalOcean to the rescue
DigitalOcean(DO) has a very nice DNS management and I’m using it for most of my domains.
I remembered that DO has some REST API’s, so I tried to search for cases where people use it’s DNS API’s.
And there were a lot of people who is doing it.
Even DO itself has page with info about how to use their API to have DynDNS like functionality.
So I created a simple bash script, made it configurable through the environment and packed it into docker container. It’s pretty simple but still gives you the ability to configure almost everything without a need to rebuild the container.
The minimum you need to use it is : - API key from DigitalOcean, - Domain you want to update - Record ID assigned to your domain by DigitalOcean.
The most tricky part is to get domain record ID. I found it easy to just find it in the DOM of the DigitalOcean’s domain editor: https://cloud.digitalocean.com/domains/YOUR_DOMAIN
For each DNS record you will have form in the source, like:
<form class="edit_domain_record" data-validate="true" action="/domains/<DOMAIN>/records/<RECORD_ID>" accept-charset="UTF-8" method="post">
An alternative way is to use their API to get this data.
curl -X GET -H "Content-Type: application/json" -H "Authorization: Bearer <API_KEY>" "https://api.digitalocean.com/v2/domains/<DOMAIN>/records"
You will get JSON response with your records.
Code lives here and docker image is here
So now, with container ready, the only thing left is schedule it to run periodically to update DNS records.
Kubernetes Scheduled Jobs
Since 1.4 release of Kubernetes, I wanted to try the new Scheduled Jobs feature. This seemed like a perfect use case. Scheduled Job is Kubernetes own cron. Allowing one to schedule periodic tasks in similar to crontab’s way.
To be able to run our ScheduledJob we need to create only 2 manifests: ConfigMap and ScheduledJob itself.
apiVersion: v1
kind: ConfigMap
metadata:
  name: dodns-configmap
data:
  domain: ""
  record: ""
  apikey: ""
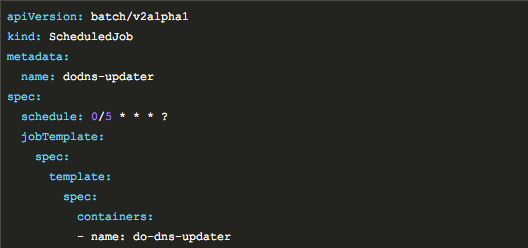
apiVersion: batch/v2alpha1
kind: ScheduledJob
metadata:
  name: dodns-updater
spec:
  schedule: 0/5 * * * ?
  jobTemplate:
    spec:
      template:
        spec:
          containers:
          - name: do-dns-updater
            image: dodns-updater:0.1
          restartPolicy: OnFailure
          env:
          - name: DOMAIN
            valueFrom:
              configMapKeyRef:
                name: config
                key: domain
          - name: RECORD
            valueFrom:
              configMapKeyRef:
                name: config
                key: record
          - name: APIKEY
            valueFrom:
              configMapKeyRef:
                name: config
                key: apikey
          volumes:
          - name: config
            configMap:
              name: dodns-configmap
Of course one can put everything inside ScheduledJob itself, but I prefer to separate configuration from execution.
Repository with manifests are here
This configuration works for me for about a month now, and it’s pretty good so far. I’m able to access my GitLab and docker hub using short easy to remember domain, without a need to confirm it’s usage every month.

Share this post
Twitter
Google+
Facebook
Reddit
LinkedIn
StumbleUpon
Email