Agola - One CI To Run Them All
Getting started with Agola. Initial setup and integration with Github, Gitlab and Gitea.
I’ve been looking for a good Continues Integration(CI) system for quite some time now. System, that could work with all the major repository providers and run on my hardware. The need for multi-provider support comes from the fact that my code is spread across:
- Github
- Gitlab, cloud and self-hosted
- Gitea - I’m currently replacing my self-hosted Gitlab with it. I find it much simpler and faster.
This means I can neither have a single view of all my tests nor have a unified way of testing. Of course, one could pay for some cloud-based CI/CD system and solve the problem. In my case, it doesn’t make any sense to pay for cloud solutions. I have more than enough computing power in my home-lab to run any CI. The code that I need to test is either open-source or for personal projects. There are OSS solutions out there that could do the work, but I didn’t find a single one that could tick all my boxes:
- Gitlab supports integration with different external providers, but only on a paid plan
- Drone only works with the single integration at a time, so you need to run one instance per provider.
- Jenkins - not sure if it can, but I’d rather not go this way.
That’s why I got excited when I’ve found out about the release of Agola.
Overview
Agola is a new CI system developed by @sgotti, the guy who built stolon - cloud-native HA PostgreSQL manager. I like the approach he used building stolon. He took great software - PostgreSQL and made it cloud-native. Not by stockpiling a bunch of bash scripts and voodoo magic like others, but by writing proper code.
Apart from the author, a few of the main selling points for me were:
- Multiple git sources integrations - a single CI for all my repositories.
- User direct runs - ability to run CI tests against your local code without committing it to the server.
- Advanced workflows - like matrix builds, fan-in, fan-out, multi-arch.
- Golang and OSS - should be very resource-efficient and easy to contribute
You can find a full list of features in this introductory blog post.
Installation
This is my second attempt trying to get it up and running. The first one happened a few weeks after the initial release - v0.1, and I couldn’t make it work. I didn’t have enough time to dig into details, so I decided to give it another try later, This time, with version 0.4, I managed to get it up and running and using it for a month now.
Installation could be a bit tricky because information about it is split between the try-it section and actual Documentation. If you, like me, never use those everything-in-one-container setups and skip the try-it section, you can spend a lot of time trying to figure out why your login/register buttons do not work and you can’t log in.
To get Agola up and running in a Kubernetes cluster, assuming you do not want to use all-in-one demo container, you need to:
- Deploy Etcd if you don’t have one already.
- Deploy MinIO or any other S3-compatible object storage.
- Deploy Agola from the example in the repo
- apply RBAC rules from the repo - https://github.com/agola-io/agola/blob/master/examples/kubernetes/common/rbac.yml
- deploy the actual manifests - https://github.com/agola-io/agola/tree/master/examples/kubernetes/distributed
I’m not going to cover how to install etcd, because it varies wildly based on how resilient the system should be, or where you’re running it.
Adding Providers
After you’ve managed to install the system, you need to add at least one repository provider. Otherwise, you’ll get an empty page trying to login or register. Agola does not have it’s own authentication mechanisms and relies on the providers. Which makes perfect sense, you need to connect at least one repository provider to use it anyways.
The workflow of adding a repository provider is the same. You need to get ClientID and Client Secret and use Agola CLI to add it. Below are the steps needed to get those ClientID and Secret for different providers.
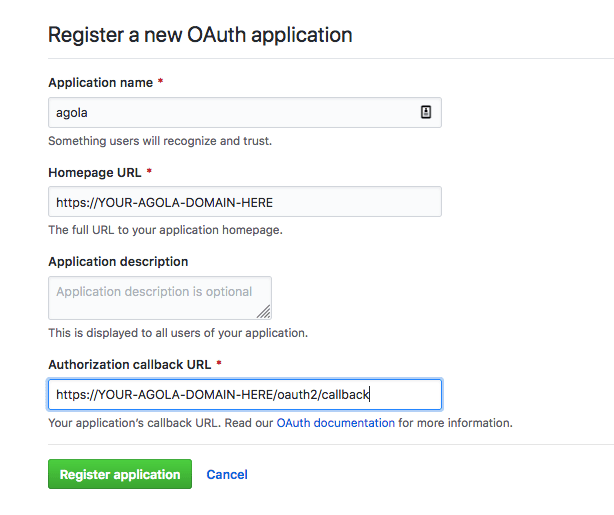
Github
On Github you need to go to settings/applications to add an OAuth application:
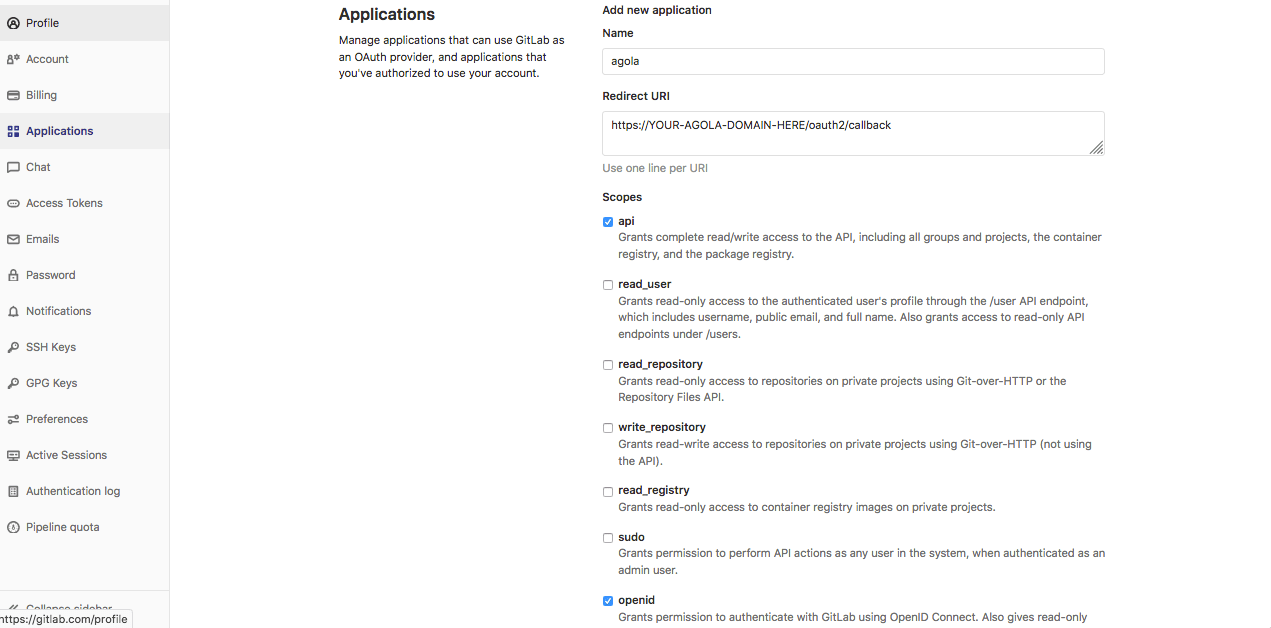
Gitlab
In Gitlab you need to open the profile/applications section. You can also configure the level of permissions you want to give to the new application.
Gitea
To create a new application in Gitea, go to /user/settings/applications page.
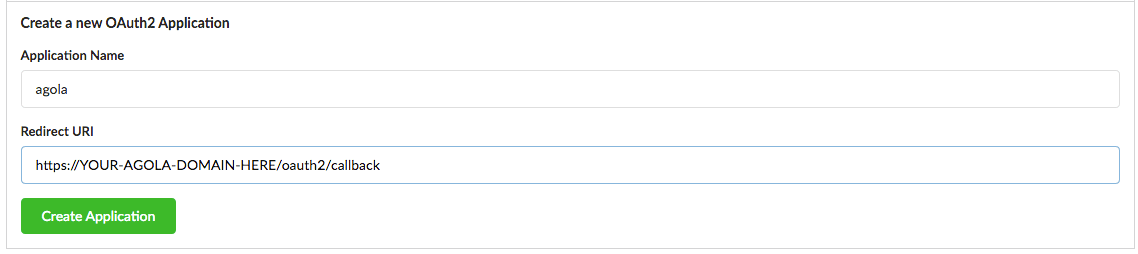
Step by step guide on how to add oauth2 provider could be found in gitea documentation page
Agola side
To add a new provider you need to exec to the agola’s gateway pod and use Agola’s CLI. You also need $ADMIN_TOKEN, which you set during the installation in the configuration YAML
    kubectl exec -it agola-gateway-pod /bin/bash
    # add gitea
    root$ agola remotesource create \
    --name gitea \
    --type gitea \
    --api-url https://gitea.yourdomain.com \
    --auth-type oauth2 \
    --clientid $GITEA_APP_CLIENTID \
    --secret $GITEA_APP_CLIENTSECRET \
    --token $ADMIN_TOKEN \
    --skip-ssh-host-key-check

    # add github
    kubectl exec -it agola-gateway-pod /bin/bash
    root$ agola remotesource create \
    --name github \
    --type github \
    --api-url https://api.github.com \
    --auth-type oauth2 \
    --clientid $GITHUB_APP_CLIENTID \
    --secret $GITHUB_APP_CLIENTSECRET \
    --token $ADMIN_TOKEN

    # add gitlab
    kubectl exec -it agola-gateway-pod /bin/bash
    root$ agola remotesource create \
    --name gitlab \
    --type gitlab \
    --api-url https://gitlab.com \
    --auth-type oauth2 \
    --clientid $GITHUB_APP_CLIENTID \
    --secret $GITHUB_APP_CLIENTSECRET \
    --token $ADMIN_TOKEN
Now you can register and login using any of those providers in the web UI.
Direct runs
Direct runs is a unique feature of the Agola and so far my favorite.
Direct runs allow you to run the CI pipeline without pushing the code to the remote. So, you don’t have to create tens of the commits to the repo labeled testing the CI.
You can test your local code in the CI environment, using a simple command:
agola --gateway-url=https://agola.yourhost.address --token=<YOUR_TOKEN> directrun start
You can create a token from the user/settings page in the Agola Web UI.
Under the hood the directrun start command will commit everything into a temporary git branch and push it to an internal git repository, then it’ll run build as if it were normal.
Secrets and variables
Agola, like any other CI system, allows you to add secrets and variables to your jobs. It has some useful features, like group->project inheritance or dynamic per-branch secrets, but I’d say the implementation is not very polished. For example, I find the way how secrets are currently implemented very inconvenient. The only way to create one is by using Agola CLI, which means you can’t have these things under version control.
Wrap up
I only use it in a few of my projects now, but I plan to migrate all personal repositories to it. So far I like it a lot and I hope it’ll get more traction among the community.

Share this post
Twitter
Google+
Facebook
Reddit
LinkedIn
StumbleUpon
Email