
After my previous post - How to easily deploy GitLab to Kubernetes - I’ve got a lot of responses. I helped several people to get GitLab up and running on their clusters. With that manifests it became much easier to deploy GitLab to Kubernetes. It was still few things that were usually misunderstood and misconfigured. You can find out these things only by talking with people who are actually trying to use your work. Among other things, I received several requests to make helm chart for my deployment.
In case you don’t know yet. Helm is the package management system for Kubernetes. It simplifies deployments and reduces copy-pasting of manifests between projects. You can read more about it here and check for some charts here. Also, there is a great introduction post about helm here.
If you still not convinced to use helm, you can still use its charts to deploy applications manually.
To do this you need to run helm server locally and add --debug --dry-run to all install commands.
This will print resulting manifests to the terminal. You could save it to the files and apply with kubectl.
Since I was migrating most of my manifests to charts I decided to do it also with GitLab. I saw that there is a gitlab-ci chart in the official charts repository, but it only covers basic setup. So I decided to automate my existing setup. After several days this chart was born.
Some of the key features:
- Fully automated installation of GitLab.
- Register and manage LetsEncrypt certificates with kube-lego
- Deploys docker registry with an external domain (Letsencrypt protected) and integration with GitLab.
- Semi-automatic creating of Runner
- Ability to customize any of the environment variables
Things that this chart does not do:
- it does not create load balancer. If you’re using cloud provider - load balancer is already there. If you’re using baremetal, you can manually deploy one using manifests.
- it does not deploy kube-lego. It does not make any sense to me to bundle kube-lego with GitLab.
So, if you want to use TLS/SSL mode - do install kube-lego manually:
helm install --set config.LEGO_EMAIL=<your-email> stable/kube-lego. For production deploy, you will also want to set--set config.LEGO_URL=https://acme-v01.api.letsencrypt.org/directory
This post consists of a few blocks. Each block describes the minimum configuration to enable the feature.
Navigation:
Getting started
First of all, you need to clone my repository with the chart.
$ git clone https://github.com/lwolf/gitlab-chart
$ cd gitlab-chart/gitlab
# Make a copy of the original values files
$ cp values.yaml values-test.yaml
If you open this values file you may notice a few important sections:
- ingress - used to configure ingress rules
- persistence - persistent storage configuration
- config - primary configuration block for all GitLab related settings. All variables from here could be used.
- postgresql - settings related to the PostgreSQL subchart
- redis - settings related to the Redis subchart
- minio - settings related to the Minio subchart
- runner - settings related to the Runner subchart
- registry - settings related to the Docker Registry subchart
I recommend you to set persistence to false in all components until you end up with the config you’re happy with.
Minimum install
Let’s start with the simple GitLab installation. It covers:
- basic gitlab installation
- external domain gitlab.example.com with SSL from LetsEncrypt
config:
  GITLAB_ROOT_EMAIL: "[email protected]"
  GITLAB_HOST: "gitlab.example.com"
  GITLAB_SSH_HOST: "git.example.com"

ingress:
  enabled: true
  # configNamespaceOverride: "default"
  annotations:
    kubernetes.io/ingress.class: nginx
    kubernetes.io/tls-acme: 'true'
  hosts:
    - gitlab.example.com
  tls:
    - secretName: gitlab-server-tls
      hosts:
        - gitlab.example.com
This is the minimum config you need to write in your values-test.yaml to deploy GitLab.
One setting worth mentioning here - configNamespaceOverride. It sets namespace in configmap for TCP port rules. Set it, if your load balancer is deployed to the namespace other than the one you’re deploying GitLab.
Let’s try to install it.
# add repository (needed for dependencies)
$ helm repo add lwolf-charts http://charts.lwolf.org
# get dependencies
$ helm dep build
# First run it with --debug --dry-run to check that everything is fine.
$ helm install -f values-test.yaml . --namespace=gitlab --debug --dry-run
# Next install it.
$ helm install -f values-test.yaml . --namespace=gitlab
watch kubectl get pods --namespace=gitlab --watch for the progress.
Complete installation takes around 5 minutes. I found the next script very useful:
$ while ! curl --output /dev/null --silent --head --fail https://gitlab.example.com/help; do sleep 1 && echo -n .; done
................
It will keep polling GitLab until it became available.
After everything is up and running you can access your GitLab with login root(or email).
The chart will generate a random password on each run. You can override this behavior by setting config.GITLAB_ROOT_PASSWORD setting.
Installation generates all secrets on each run. Make sure to save them an update values-test.yaml after the first run. I added a
dump_secrets.shscript to the repository to make it easier. Runbash dump_secrets.sh <install-name>and save the result to the config section.
GitLab CI multi runner
I spent some time trying to automate GitLab runner creating. It seems that it’s impossible now due to some limitations at GitLab side.
But I was able to semi-automate it. Instead of running registration of runner after the installation manually, I’m doing it as a part of the installation process.
First let’s take a look at the options we need to set for the runner.
config:
  GITLAB_SHARED_RUNNERS_REGISTRATION_TOKEN: "186f6cdcb713ad560EXAMPLETOKEN"

minio:
  accessKey: "AKIAIOSFODNN7EXAMPLE"
  secretKey: "wJalrXUtnFEMI/K7MDENG/bPxRfiCYEXAMPLEKEY"

runner:
  enabled: true
  gitlabUrl: "https://gitlab.example.com/ci/"
  registrationToken: "186f6cdcb713ad560EXAMPLETOKEN"
  cache:
    enabled: true
    accessKey: "AKIAIOSFODNN7EXAMPLE"
    secretKey: "wJalrXUtnFEMI/K7MDENG/bPxRfiCYEXAMPLEKEY"
Important parts here are tokens and accessKeys.
To make automatic runner registration possible we need to set config.GITLAB_SHARED_RUNNERS_REGISTRATION_TOKEN and set runner.registrationToken to the same value.
Few words about the logic behind creating runners.
First, we’re registering the runner in GitLab. This is done by the job automatically. The only requirement is registrationToken . The second step is to provide runners token to the setup and run upgrade. This will create deployment for the runner.
With runner, our setup process will now consist of the two steps. First will install GitLab and all its components. It will also register the new runner. The second step will be to upgrade setup will runner token. You could get it from the web interface after GitLab became available - https://gitlab.example.com/admin/runners/1.
# Install it as usual
helm install -f values-test.yaml . --namespace=gitlab
# Wait until GitLab is up and running.
# Open GitLab runner configuration and check that Runner is successfully registered.
# Copy token and run upgrade.
helm upgrade -f values-test.yaml --set runner.token=<TOKEN> <install-name> . --namespace=gitlab
To test that everything works try import test repository and run tests.
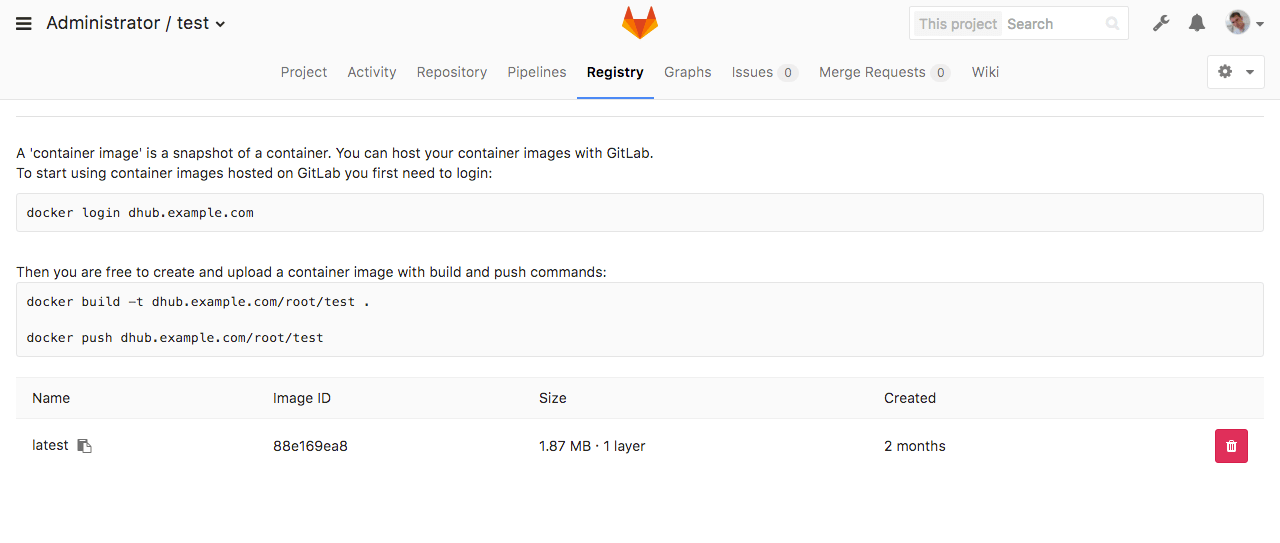
Docker registry
Another important part of the installation is docker registry. My previous manifests did not do real integration between GitLab and docker registry.
In this setup registry is fully integrated with GitLab. Authentication is handled by GitLab. Images are shown in the UI.
At the same time, the registry is still accessible from the outside world by separate domain. With automatic LetsEncrypt certificate.
Here is the settings that needs to be set to enable registry.
config:
  GITLAB_REGISTRY_ENABLED: true
  GITLAB_REGISTRY_HOST: dhub.example.com
  GITLAB_REGISTRY_PORT: 443
  GITLAB_REGISTRY_API_URL: https://dhub.example.com
  GITLAB_REGISTRY_KEY_PATH: /certs/tls.key
  SSL_REGISTRY_KEY_PATH: /certs/tls.key
  SSL_REGISTRY_CERT_PATH: /certs/tls.crt

registry:
  enabled: true
  authTokenRealm: "https://gitlab.example.com/jwt/auth"
  ingress:
    enabled: true
    annotations:
      kubernetes.io/ingress.class: nginx
      kubernetes.io/tls-acme: 'true'
    hosts:
      - dhub.example.com
Certificates will be mounted in both gitlab and registry pods to the directory /certs.
After the installation, you can clone test repository and open registry tab. You should be able to log in and push images to this repository.
Advanced settings
It’s more than 200 different settings that could be set to customize the setup. I split it into logical parts which could be enabled and disabled.
├── templates
│   ├── partials
│   │   ├── _advanced.yaml
│   │   ├── _backup.yaml
│   │   ├── _backup_aws.yaml
│   │   ├── _backup_gcs.yaml
│   │   ├── _email.yaml
│   │   ├── _gitlab_registry.yaml
│   │   ├── _imap.yaml
│   │   ├── _ldap.yaml
│   │   ├── _nginx_tuning.yaml
│   │   ├── _oauth.yaml
│   │   ├── _rack.yaml
│   │   ├── _smtp.yaml
│   │   └── _ssl.yaml
For example to enable SMTP you need to set SMTP_ENABLED=true and add other settings related to SMTP.
config:
    SMTP_ENABLED: true
    SMTP_DOMAIN: gitlab.example.com
    SMTP_HOST: smtp.mailgun.org
    SMTP_PORT: "587"
    SMTP_USER: *******
    SMTP_PASS: *******
    SMTP_STARTTLS: "true"
    SMTP_AUTHENTICATION: login
All settings have the same name as in sameersbn/docker-gitlab image.
TL;DR;
To install GitLab with registry and runner you need to do the following:
Manual way (with clonning github-repository)
# add repository (needed for dependencies)
$ helm repo add lwolf-charts http://charts.lwolf.org

$ git clone https://github.com/lwolf/gitlab-chart
$ cd gitlab-chart/gitlab
# get dependencies
$ helm dep build
# copy values file
$ cp values.yaml values-test.yaml
# edit your values-test.yaml file.

# Install it as usual
$ helm install -f values-test.yaml . --namespace=gitlab

# Wait until gitlab is up and running.
$ while ! curl --output /dev/null --silent --head --fail https://gitlab.example.com/help; do sleep 1 && echo -n .; done
...................................................

# Open gitlab runner configuration and check that Runner is successfully registered.
# Copy token and run upgrade.
$ helm upgrade -f values-test.yaml --set runner.token=<TOKEN> <install-name> . --namespace=gitlab
Automatic way (installation directly from the chart-repository)
# add repository (needed for dependencies)
$ helm repo add lwolf-charts http://charts.lwolf.org

# get default values.yaml file
$ curl https://raw.githubusercontent.com/lwolf/gitlab-chart/master/gitlab/values.yaml -o values-test.yaml

# install
$ helm install -f values-test.yaml lwolf-charts/gitlab
# Wait until gitlab is up and running.
$ while ! curl --output /dev/null --silent --head --fail https://gitlab.example.com/help; do sleep 1 && echo -n .; done
...................................................

# Open gitlab runner configuration and check that Runner is successfully registered.
# Copy token and run upgrade.
$ helm upgrade -f values-test.yaml --set runner.token=<TOKEN> <install-name> lwolf-charts/gitlab --namespace=gitlab
Conclusion
This chart is in the early stage and it still needs some refactoring and a lot of testing.
I’m not using lot’s of the features like gce_backups or LDAP integrations, so it is not tested at all.
If you’re using my previous manifests or going to use this chart - let me know about any issues.
For now, the roadmap looks like this:
- testing/refactoring
- splitting registry/runner into separate charts
- more flexible runner configuration
- monitoring of the whole thing in Prometheus

Share this post
Twitter
Google+
Facebook
Reddit
LinkedIn
StumbleUpon
Email