Migrate infrastructure to K8s. Part 2. Basic services.
Deploying DNS and dashboards to Kubernetes cluster
In previous post
I finished description of installation of kubernetes cluster on bare-metal hardware.
At this point we should be able to communicate with it using kubectl
In this post I will go through installation of basic services to use and monitor cluster. For example DNS, heapster and different dashboards.
Deploying addon services
Kubernetes comes with several very useful addons, available on its github, either in kubernetes or in contrib. But all these addons still needs to be installed.
Before we begin with this, we need to do one preparation step - create system namespace.
By default, Kubernetes has only one namespace, called default.
But most of the addons available on the Internet requires you to have a separate namespace for system needs.
It should be called kube-system.
Creating system namespace
As far as I heard Kubernetes is going to create it automatically from version 1.3. Its not released yet. So, first, let’s check namespaces we have in our cluster. Getting namespaces is as simple as getting any other type of objects inside Kubernetes:
$ kubectl get namespaces
NAME          STATUS    AGE
default       Active    53d
If kube-system is not among them we need to create it.
To do it we need to create simple yaml (or json) file and send it to Kubernetes.
Let’s create file kube-system.yaml with the following content:
# kube-system.yaml

kind: Namespace
apiVersion: v1
metadata:
  name: kube-system
It’s simple and self-explanatory: create a new entity of type Namespace with the name kube-system.
Now we need to deploy it to the cluster:
kubectl create -f kube-system.yaml
That’s it. Running kubectl get namespaces after this, should return two namespaces.
Deploying DNS service
This one is also part of the standard addons available in Kubernetes repository.
To deploy it we need to know IP address of DNS and the name of the cluster we used during minions creating.
If we’re using default IP address for DNS server (10.100.0.10) and
default cluster name (cluster.local) we can just deploy it as is.
Otherwise, we need to change skydns-rc.yaml to match our settings.
# kubernetes/cluster/addons

kubectl --namespace=kube-system create -f skydns-rc.yaml
kubectl --namespace=kube-system create -f skydns-svc.yaml
Lets test that DNS is working. We can do this by runnning nslookup from some pod.
First, we need to have a pod with nslookup available.
Create the file called busybox.yaml and deploy it with kubectl create -f busybox.yaml.
apiVersion: v1
kind: Pod
metadata:
  name: busybox
  namespace: default
spec:
  containers:
  - image: busybox
    command:
      - sleep
      - "3600"
    imagePullPolicy: IfNotPresent
    name: busybox
  restartPolicy: Always
After this, we can test that DNS works
> $ kubectl exec busybox -- nslookup kubernetes.default
Server:    10.100.0.10
Address 1: 10.100.0.10

Name:      kubernetes.default
Address 1: 10.100.0.1
Deploy Kubernetes dashboards
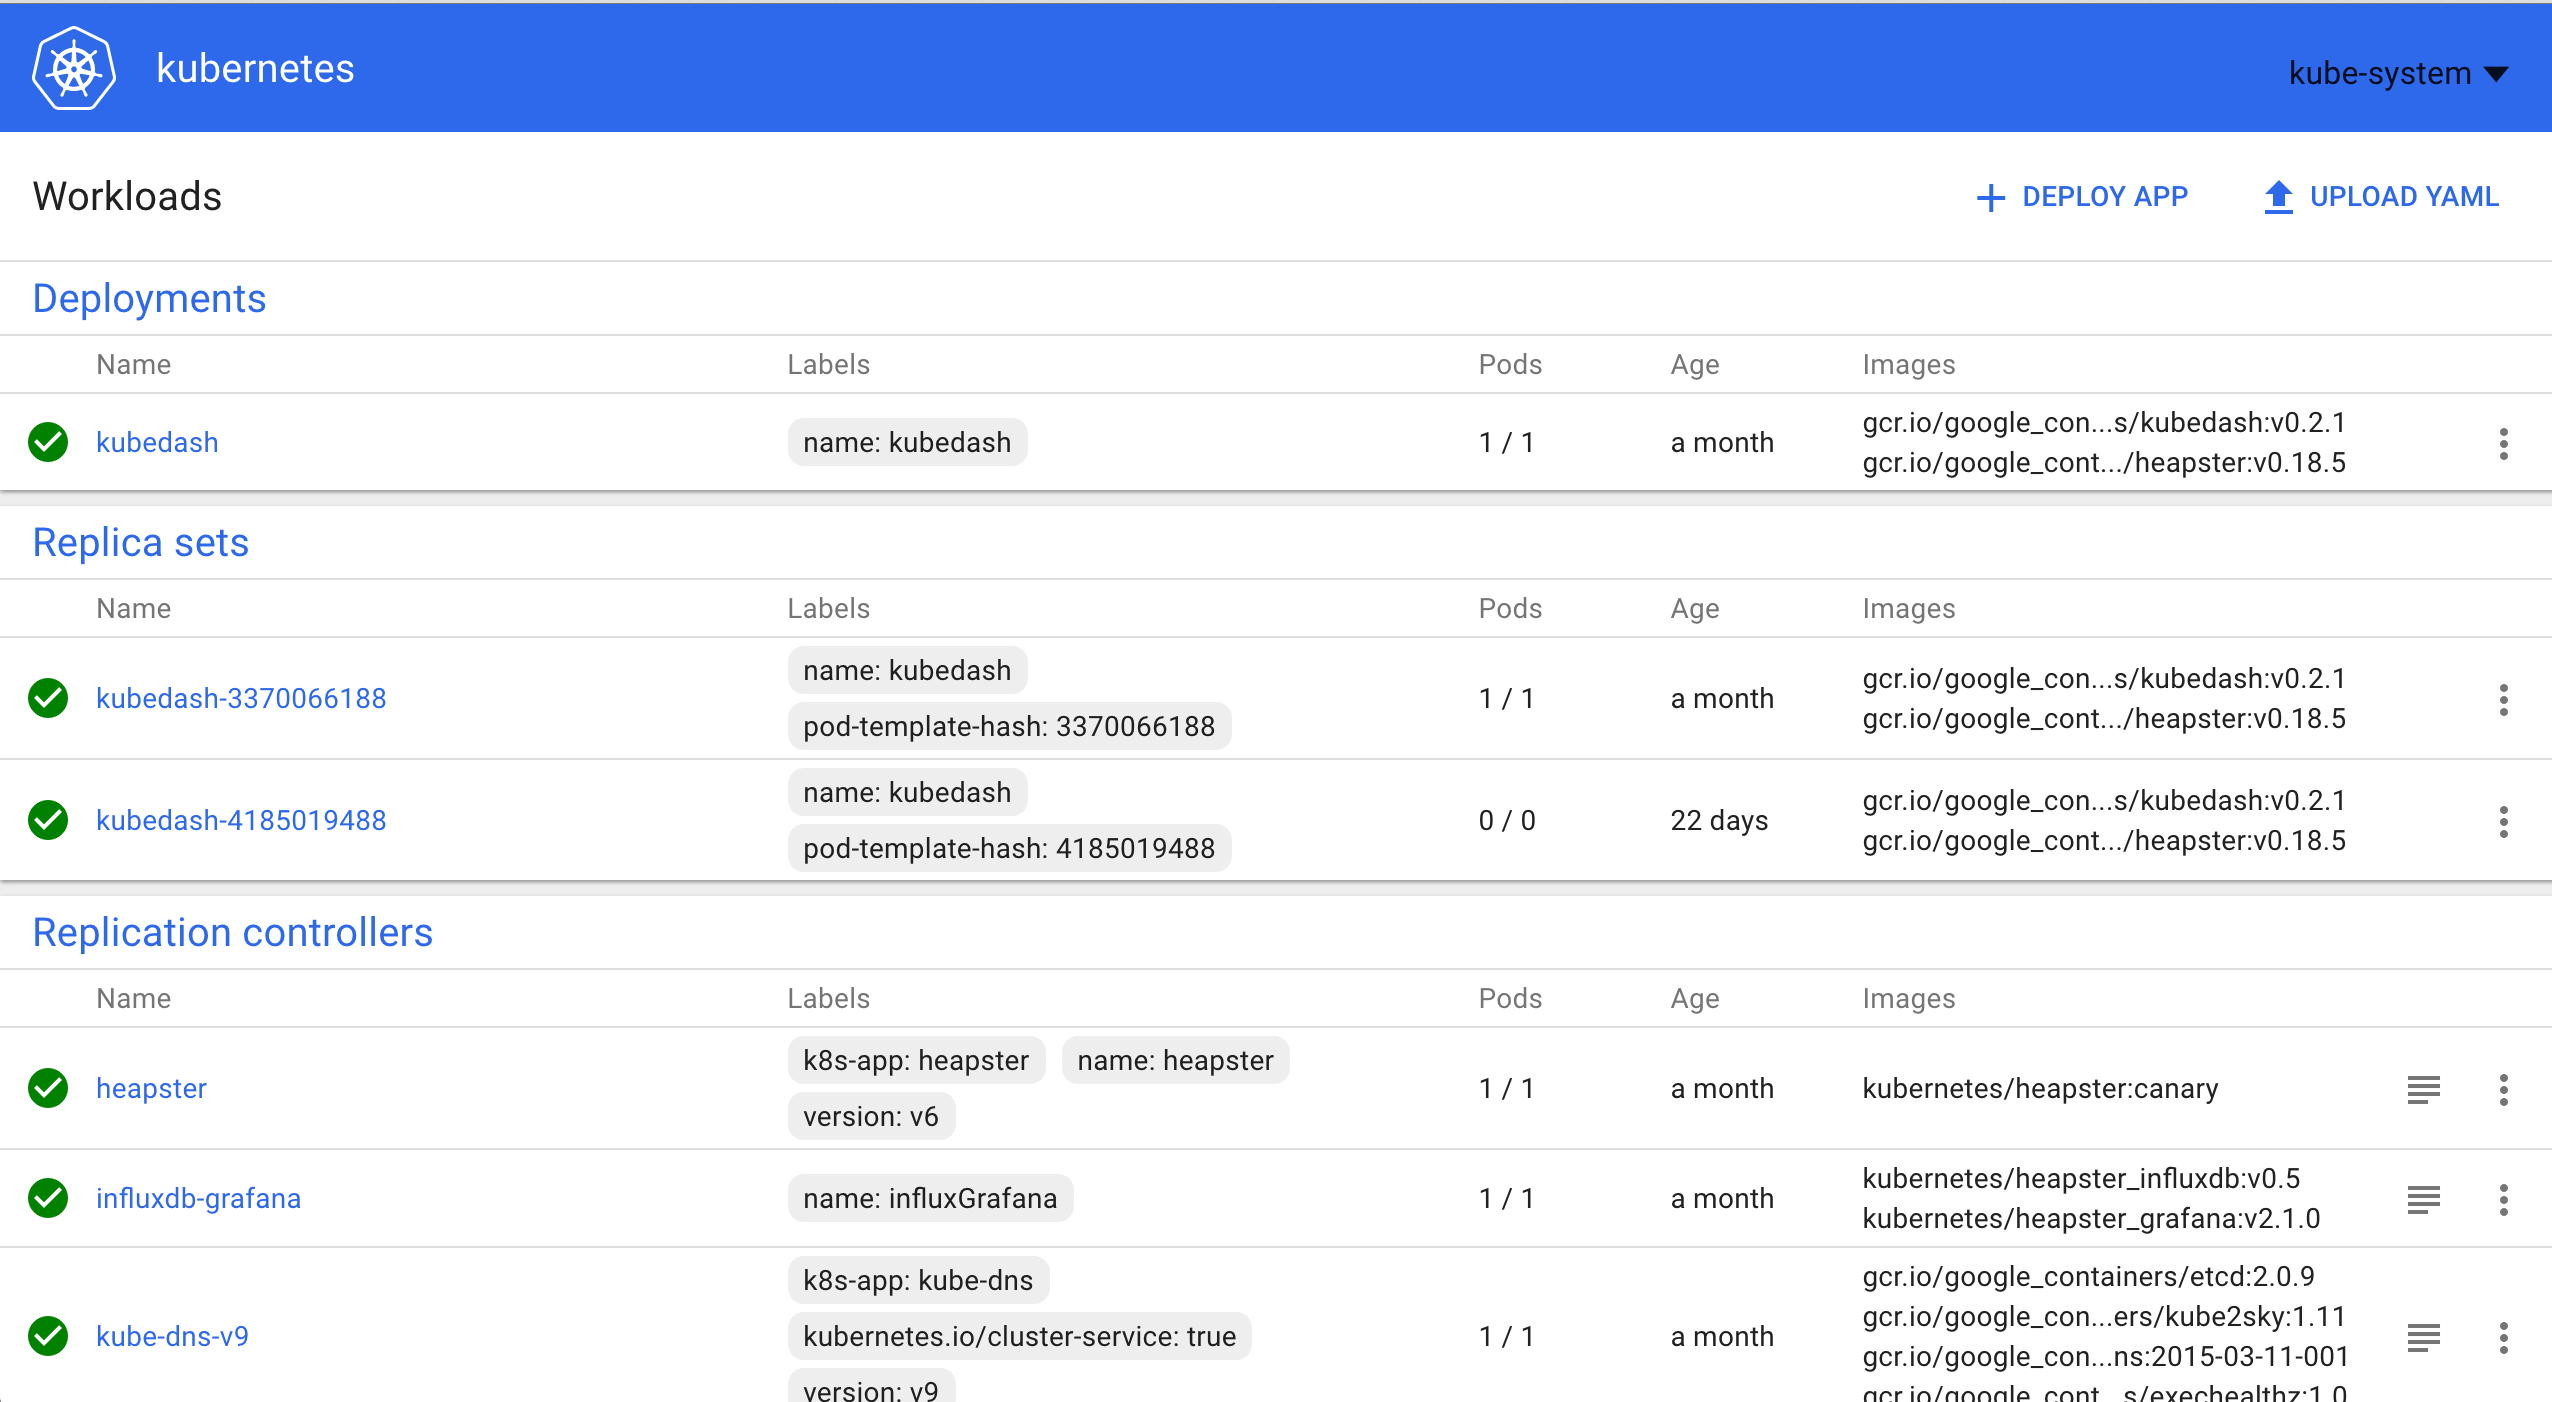
Now we want to have nice dashboards to monitor our cluster state and may be, even deploy new services from the web.
For this, Kubernetes used to have two dashboards. But now it looks like that they replaced old one in addons.
I have both installed, but the old one is kinda useless. So let’s take a look only at the new one, which is now the default.
Deploy scripts could be found in k8s cluster/addons and also in dashboards own repository.
Lets deploy it:
kubectl create -f https://rawgit.com/kubernetes/dashboard/master/src/deploy/kubernetes-dashboard.yaml
To access it we need to run kubectl cluster-info to find out URLs.
> $ kubectl cluster-info
Kubernetes master is running at https://10.10.30.11:443
KubeDNS is running at https://10.10.30.11:443/api/v1/proxy/namespaces/kube-system/services/kube-dns
kubernetes-dashboard is running at https://10.10.30.11:443/api/v1/proxy/namespaces/kube-system/services/kubernetes-dashboard
...
Deploying heapster
Heapster is one of the systems used in Kubernetes to collect metrics.
git clone https://github.com/kubernetes/heapster
cd heapster
kubectl create -f deploy/kube-config/influxdb
Heapster uses grafana dashboard to show its metrics which will be installed as part of it.
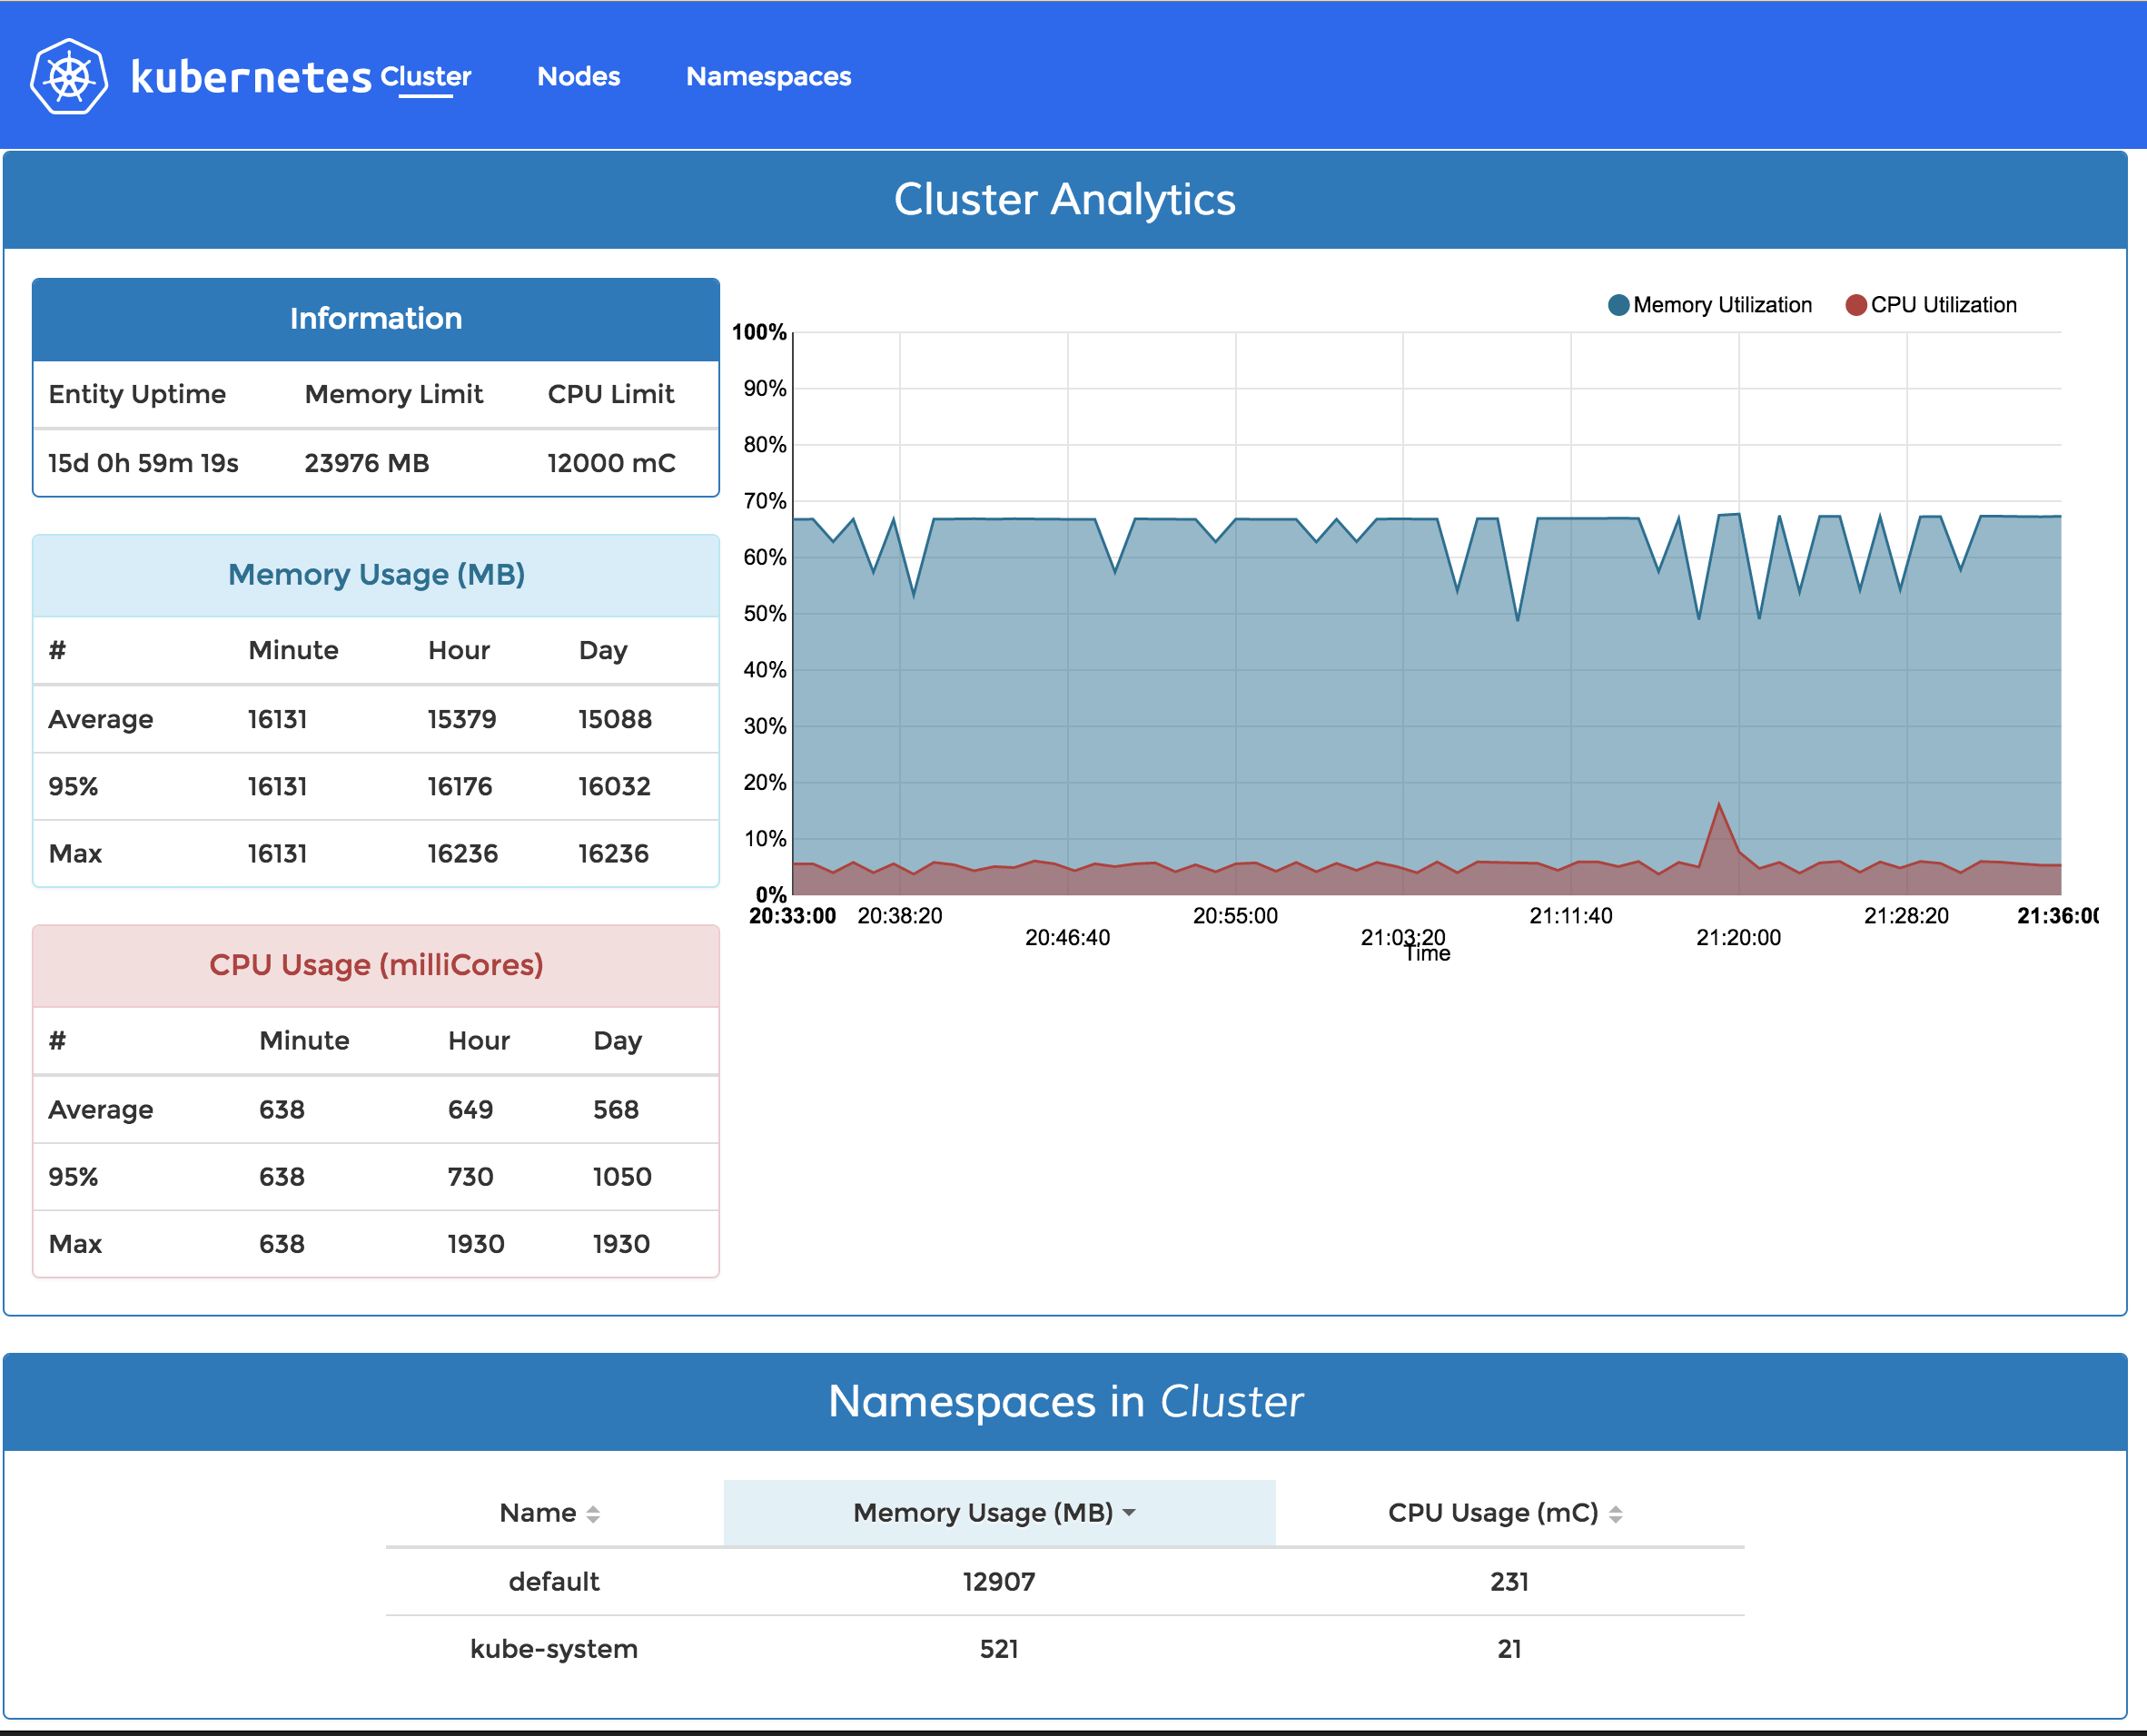
But it also has another dashboard - kubedash, which is pretty simple and nice for a quick overview of resource usage.
git clone https://github.com/kubernetes/kubedash
cd kubedash
kubectl create -f deploy/bundle.yaml
After deploy, kubedash will be available on https://<kubernetes-master>/api/v1/proxy/namespaces/kube-system/services/kubedash/.
Deploy newrelic daemon
I’m using NewRelic service all the time to monitor my applications and servers. So I’m going to run it as a daemon on all minions. I’m running it also on masters, and it looks like I forgot to mention it in my previous post. So, here is my SystemD unit to run NewRelic container.
    - name: newrelic-nrsysmond.service
      command: start
      content: |
       [Unit]
       Description=Newrelic monitoring
       After=systemd-networkd.service
       [Service]
       Restart=always
        TimeoutStartSec=1200s
        ExecStartPre=-/usr/bin/docker rm nrsysmond
        ExecStart=/usr/bin/docker run \
          --net=host \
          --pid=host \
          --privileged=true \
          --name nrsysmond \
          -v /sys:/sys \
          -v /sys:/sys \
          -v /dev:/dev \
          -v /var/run/docker.sock:/var/run/docker.sock \
          -v /var/log:/var/log:rw \
          -e NRSYSMOND_license_key=<API-KEY> \
          -e NRSYSMOND_logfile=/var/log/nrsysmond.log \
          newrelic/nrsysmond:latest
        ExecStop=-/usr/bin/docker stop nrsysmond
        ExecStopPost=-/usr/bin/docker rm nrsysmond
NewRelic configuration I’m going to deploy, with great readme btw, could be found in kubernetes/examples/newrelic.
Shortly, to run NewRelic in the pod we need to create a config file and then create a base64 hash of it, after this we can deploy it.
To use config-to-secret.sh script from repository we need a Linux machine.
kubectl create -f newrelic-config.yaml
kubectl create -f newrelic-daemonset.yaml --validate=false
That’s it for now. At this point, we have fully operational Kubernetes cluster with DNS and dashboards showing all our deployed containers and resource usage.

Share this post
Twitter
Google+
Facebook
Reddit
LinkedIn
StumbleUpon
Email